Annotating viewports | ||||||||
|
| |||||||

Viewport arrow and text annotations are saved with the model database or with the output database when you exit the Abaqus/CAE session. You can also copy annotations from a model to an output database and vice versa.
| Warning: You can always create or copy annotations to an output database; however, you can save them only if you opened the database with write privileges. |
- Text
-
Text annotations can consist of any characters that can be displayed using the fonts available on your workstation. Abaqus/CAE does not restrict the length or number of text lines in an annotation. However, you must take the size of the viewport into consideration when creating text annotations; the text should fit in the desired viewport location. You can place text anywhere on the viewport, and you can move a text annotation or change its anchor point after you have created it. Each text annotation can be displayed using different fonts, colors, and backgrounds, but you cannot change these attributes within a single text annotation.
- Arrows
-
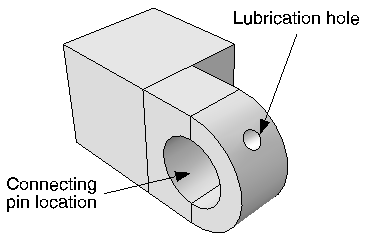
You can create arrows anywhere in the viewport; typically, an arrow will connect a text annotation to a point in model coordinates. Arrows can have one of several different line thicknesses, line styles, and endpoint styles and can be displayed in any color available on your workstation. You can use one or two anchor points to control the position of an arrow annotation. For example, you can anchor the arrowhead to a point on the model and the tail to a viewport location so that when the model is manipulated the arrow still points to the desired feature but the tail is stationary. You can modify and move an arrow after you have created it.
- Arrow and text combination
-
You can create a combined arrow and text annotation. This method uses a reduced set of options to create an arrow annotation, anchored at the arrowhead, with a text annotation positioned at the arrow's tail. This creation method is provided to simplify the addition of information about specific parts of a model or results. You cannot edit the annotations' position during creation, except by using the button (
 ) in the prompt area. However, once you create them, the arrow and
text are saved independently; so you can edit them using all the options
available for each annotation type.
In addition to the viewport annotations that you can create, Abaqus/CAE generates some annotations to provide the context of the view in a viewport. Abaqus/CAE generates the 3D compass and the view triad to show the orientation of the model in the viewport; in the Visualization module the legend, the title block, and the state block are generated to indicate various aspects of the analysis results in the viewport. The Viewport Annotation Options dialog box allows you to show or hide all viewport annotations—yours and those generated by Abaqus/CAE—you can also use it to edit the attributes of the generated annotations. For more information, see Customizing viewport annotations.